Showing posts with label Dresses. Show all posts

 
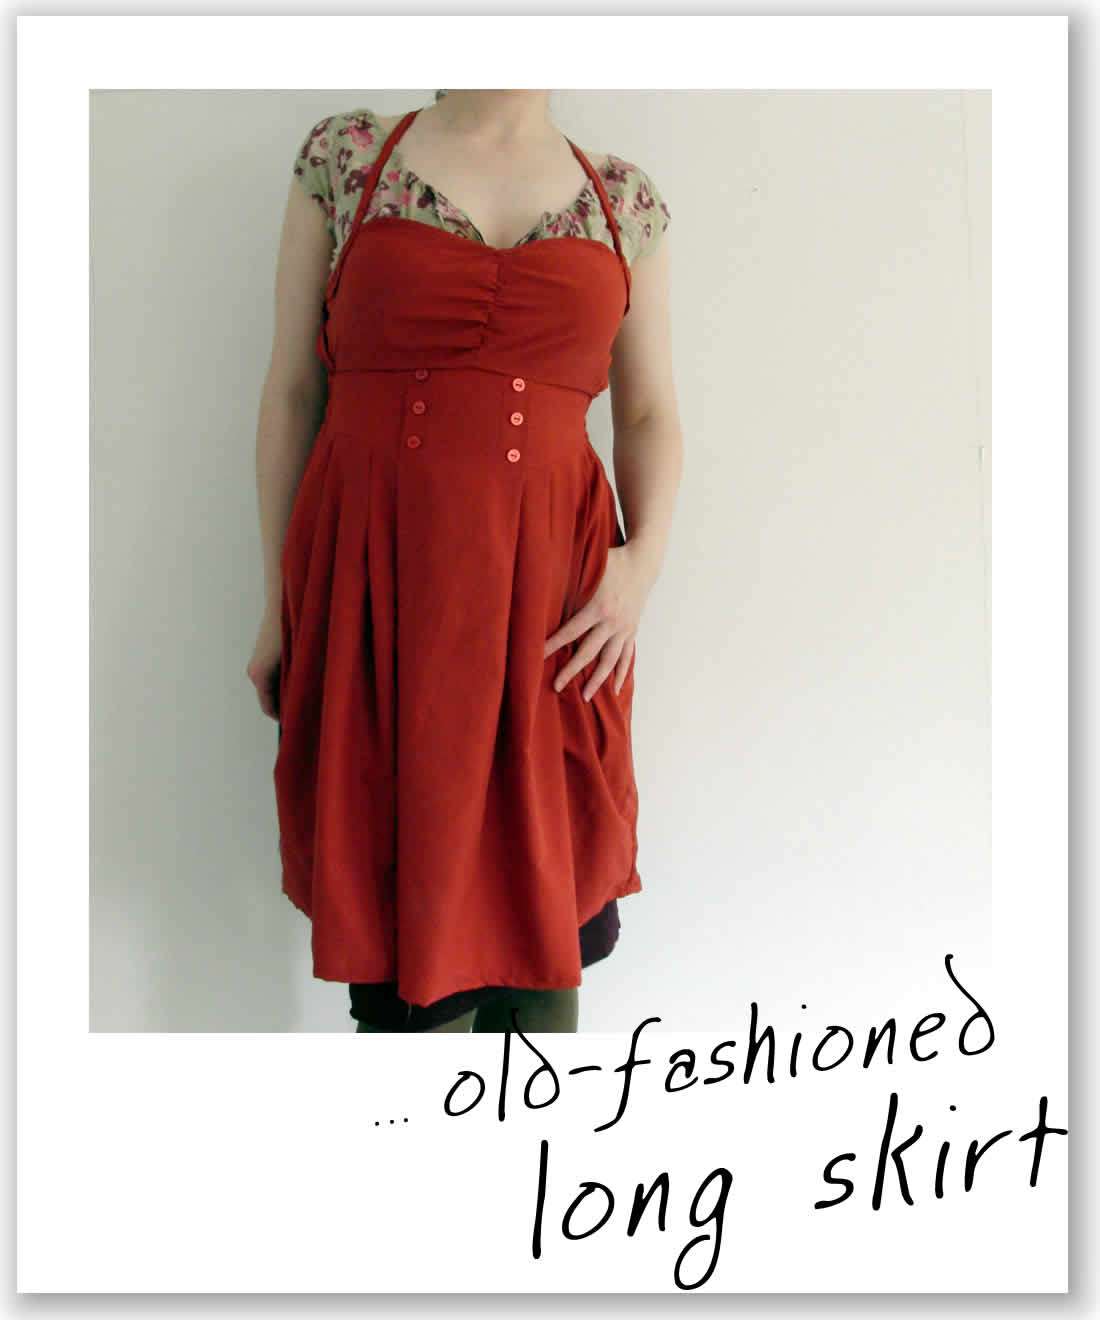
Not strictly a remake, although I got the fabric dirt cheap about 8 years ago. This dress represents how much I've learnt over the last 18 months; from other blogs, books, magazines; but mainly from my own mistakes. I used several different techniques to create it.
 
The bottom was based on a dress I already own, the bodice and sleeves adapted from Burdastyle's Kristen pattern and the collar was a bit of freestyling, inspired by a top I saw online. 

I extended each side of the front bodice. crossed them over, wrapped round the neck and sewed together at the back of the neck. There are various bits of stitching to hold it together but the drapes and patterning pretty much hide the construction.
The fabric has enough stretch to get it on and off without needing a zip. Yay!
I cut about 10 inches off the bottom off this skirt. There wasn't quite enough fabric for a full top (especially after it partially evaporated after a glancing blow with a hot iron. Viscose. Oops.) However, the Maryy pattern from Burdastyle was just right.

Obviously when I say 'just right' I mean, 'just right with some minor modifications'. The elastic at the back of the skirt made it difficult to attach a back bodice and so I brought the straps right round to the sides. The buttons and pleats are all original features.
I didn't think I would love it quite so much. It's super cute.
This was just one of those things that once I had the idea I had start immediately (despite the fact that I have a huge backlog of half completed projects).

I had completely overlooked the free Kasia skirt pattern on Burdastyle until I saw this lovely grey wool version. I already had a navy fleece throw from Ikea earmarked for a dress. When I was reminded of the neckline from the Danielle dress (another Burdastyle freebie) its fate was sealed.
So the top part is from the Danielle pattern and the bottom is a simplified Kasia Skirt. I kind of blended the waistbands from the two patterns together. I had expected to need to move the zips on both patterns to the side, but since the fleece has a bit of stretch, I was very pleased to discover I didn't need one at all. I also eliminated the front flap on the Kasia so the buttons are purely decorative and the pockets joined so it's like one big pouch at the front. The pocket fabric is from an old dress.
Here's a potential contender for my 'black and silver' outfit. I haven't decided yet whether it's suitable. You can see I'm wearing the silver belt I made previously.

The original skirt was knee-length. I removed the pockets and turned it round so that the zip is now at the front and the waistband is under the arms. I made sleeves using sheer fabric from Ikea (meant to be used as curtains) and some viscose lining from an old jacket (hopefully more on the jacket later).

I used a pattern from the Burdastyle Nov 09 issue for the top and sleeves. There's something really elegant about the shoulders and the cuff detail. I wasn't sure about having 12 buttons on each cuff (sounded a bit too time-consuming) so I just used some black velcro. Not as classy, but it's black on black so doesn't show.
 
Well, actually it's more like the equivalent of eight large plastic bags. 
The basic technique is to fuse thin plastic together using an iron and some baking paper to stop it sticking. This creates a strong tarpaulin-like material which can be sewn together.


The technique itself is well documented elsewhere (such as here by DIY genius Bre Pettis). I wouldn't recommend it as a great way to make clothes - unless you like wearing scratchy, stiff garments. However, if (like me) you have a friend who needs a costume for a recycled fashion show, then go crazy.

There's definitely some things to bear in mind though.
  • The plastic shrinks as you heat it - you'll need to start with much much larger pieces than you think. Also, fuse all your plastic together before you cut out your pattern pieces otherwise you'll end up with mismatched shapes.
  • The shrinkage issue also means it's tricky to iron after construction. You can do small repairs but be careful. Keep the iron on low and moving at all times.
  • The plastic has absolutely no give whatsoever so think carefully how to get in and out of your garment. I had to use a side zipper and fasteners on the shoulders to get the fitted look.  
Finding suitable plastic can be a challenge for the committed reusuable shopper. You can try raiding a less eco-friendly friend's stash of grocery bags. I mainly used charity collection sacks. I get these through my door on a weekly basis and since none of my clothes ever make it as far as the charity shop, they're a perfect source of thin plastic sheet.

Lastly, you might want to think about using your least favourite iron and ironing board. Baking paper is slippery stuff.


I have done some very quick recons recently. This was not one of them.

I had an idea in mind of a shirt-style dress and the closest thing to the picture in my head was the Kristen pattern from Burdastyle. It wasn't quite there though so I lost the contrasting plankets(?) down the front replacing them with pleats at the top only. I also added lace edging (taken from a top from the charity shop bargain bin) to the arms and collar and lost the button closure.

It's definitely one of my best made pieces as, for once, I made a toile, adjusted the fit, bothered to interface, do an invisible zipper (properly) and fully line.

 
It looks cute with a matching belt.

T-shirt

This is my winning entry to the Threadbanger T-shirt recon contest.


The dress is actually made from three t-shirts. The extra large shirt forms the skirt part. The sleeves get turned inwards to form the pockets. Here's the video tutorial with all the detail.


Here's a sketch of the original skirt.


I fell in love with the fabric - a soft green corduroy with black embroidery and sequin detail. It was about a size 20 and so there was lots of extra material to play around with. Originally from M&S but I bought it from Oxfam for around £4.


There are 3 main pieces to the dress. Areas cut away from the fabric are shown in red below. (Click on diagram to enlarge.)


I used the excess fabric to create the top piece of the dress (C). It joins the skirt (B) at the back and then comes up over the shoulders and joins to the bust piece (A) at the front. I also reused the zipper in the side seam and the original lining on the inside.